【版本】
当前版本号v20211014
| 版本 | 修改说明 |
|---|---|
| v20211014 | 初始化版本 |
【实验名称】 实验2.1 Spring 框架面向接口(Interface)编程
【实验目的】
- 掌握通过接口来实现代码的解耦
【实验环境】
- 内存:至少4G
- 硬盘:至少空余10G
- 操作系统: 64位 Windows系统。
【实验资源】
- IDEA
- Maven 3.6
【实验步骤】
打开IDEA,新建一个新的 Maven Web 开发项目
Game。在 POM.xml 文件中加入依赖包的配置。
<dependencies>
        <dependency>
            <groupId>junit</groupId>
            <artifactId>junit</artifactId>
            <version>4.13.1</version>
            <scope>test</scope>
        </dependency>
        <dependency>
            <groupId>org.springframework</groupId>
            <artifactId>spring-context</artifactId>
            <version>5.0.5.RELEASE</version>
        </dependency>
    </dependencies>
- 加入一个类
Game1,代码如下。
import game.hero.Baiqi;

public class Game1 {
    private Baiqi baiqi;

    public String heroSelected(){
        return baiqi.getName()+":“"+baiqi.say()+"”";
    }

    public void setHero(Baiqi baiqi) {
        this.baiqi = baiqi;
    }
}
- 加入一个类
Baiqi,代码如下。
public class Baiqi{

    /**
    * 返回姓名
    */
    public String getName() {
        return "白起";
    }

    /**
    * 返回口头语
    */
    public String say() {
        return "曾经,我也是个普通人。";
    }
}
【实验要求】
Game1是一个模拟游戏选择角色的类。但是由于编写不合理,和其中一个英雄角色Baiqi类紧耦合。请基于Game1和Baiqi类进行修改。Game1修改为Game2类。使得Game2可以选择不同的英雄角色,并且调用heroSelected可以返回该英雄角色的姓名和口头语。
提示1:新增一个 Hero 接口。让 Baiqi实现 Hero接口。
public interface Hero {
    String getName();
    String say();
}
提示2:修改Game1中的 Baiqi 为 Hero 接口。让
Game1和Baiqi类解耦。
- 新增一个单元测试。使得方法
testHero可以通过测试。
import game.Game2;
import game.hero.Baiqi;
import org.junit.Test;

import static org.junit.Assert.assertEquals;

public class Game2Test {

    @Test
    public void testHero(){
        Game2 game2=new Game2();
        game2.setHero(new Baiqi());
        assertEquals("白起:“曾经,我也是个普通人。”",game2.heroSelected());
    }
}
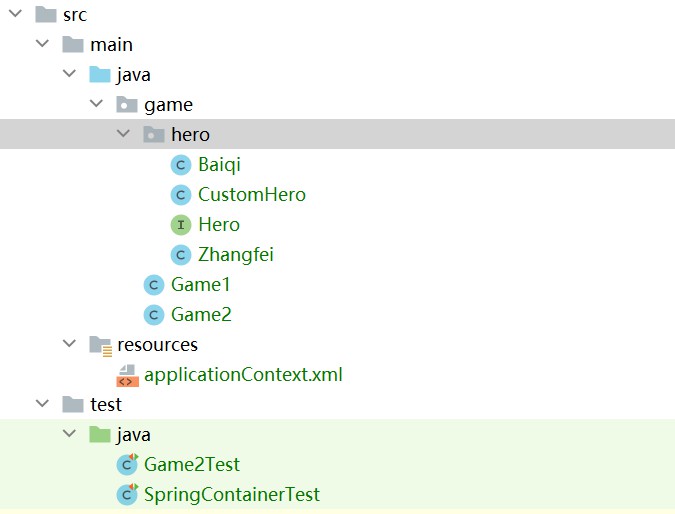
提示:项目目录结构如下所示:
【实验名称】 实验2.2 Spring 框架容器和控制反转(DI)
【实验目的】
- 掌握 Spring 框架的容器配置
- 掌握 Spring 框架控制反转的使用
【实验环境】
- 内存:至少4G
- 硬盘:至少空余10G
- 操作系统: 64位 Windows系统。
【实验资源】
- IDEA
- Maven 3.6
【实验要求】
- 基于实验2.1 的
Game项目,新增 Spring 容器的配置文件applicationContext.xml。
<?xml version="1.0" encoding="UTF-8"?>
<beans
	xmlns="http://www.springframework.org/schema/beans"
	xmlns:xsi="http://www.w3.org/2001/XMLSchema-instance"
	xsi:schemaLocation="
		http://www.springframework.org/schema/beans http://www.springframework.org/schema/beans/spring-beans-3.2.xsd">

	<!-- 使用构造器实例化 -->
	<bean id="baiqi" class="game.hero.Baiqi"></bean>
</beans>
- 新增一个单元测试
SpringContainerTest,使得方法testBaiqi能够测试通过。SpringContainerTest代码如下:
import game.Game2;
import game.hero.Baiqi;
import game.hero.CustomHero;
import org.junit.Before;
import org.junit.Test;
import org.springframework.context.ApplicationContext;
import org.springframework.context.support.ClassPathXmlApplicationContext;

import static org.junit.Assert.assertEquals;

public class SpringContainerTest {
    ApplicationContext ac;

    @Before
    public void prepareSpringContainer(){
        ac=new ClassPathXmlApplicationContext("applicationContext.xml");
    }

    @Test
    public void testBaiqi(){
        Game2 g1=new Game2();
        g1.setHero(ac.getBean("baiqi", Baiqi.class));
        assertEquals("白起:“曾经,我也是个普通人。”",g1.heroSelected());
    }
}
- 新增一个英雄角色类
Zhangfei,代码如下:
package game.hero;

public class Zhangfei implements Hero{
    @Override
    public String getName() {
        return "张飞";
    }

    @Override
    public String say() {
        return "俺也一样";
    }
}
- 请在容器配置文件
applicationContext.xml中增加Zhangfei的配置,并且在SpringContainerTest测试类中新增如下方法,使得测试能够通过。
    @Test
    public void testZhangfei(){
        Game2 g1=new Game2();
        g1.setHero(ac.getBean("zhangfei", Zhangfei.class));
        assertEquals("张飞:“俺也一样”",g1.heroSelected());
    }
【实验名称】 实验2.3 Spring 依赖注入
【实验目的】
- 掌握 Spring 容器依赖注入的2种方式编写,构造方法注入和 Setter 注入
【实验环境】
- 内存:至少4G
- 硬盘:至少空余10G
- 操作系统: 64位 Windows系统。
【实验资源】
- IDEA
- Maven 3.6
【实验要求】
- 编写一个
CustomHero类实现上面定义的Hero接口。代码如下:
public class CustomHero implements Hero{
    private String name;
    private String slogan;

    public CustomHero(){}

    public CustomHero(String name,String slogan){
        this.name=name;
        this.slogan=slogan;
    }

    @Override
    public String getName() {
        return name;
    }

    @Override
    public String say() {
        return slogan;
    }

    public void setName(String name) {
        this.name = name;
    }

    public void setSlogan(String slogan) {
        this.slogan = slogan;
    }
}
- 在Spring 容器的配置文件
applicationContext.xml分别编写2个CustomHero的实例,注入方式和内容如下。
- 使用构造方法注入实例,
id="hanxin"
name -> 韩信
slogan -> 必将百倍奉还
- 使用构造方法注入,
id="caocao"
name -> 曹操
slogan -> 周公吐哺,天下归心
- 在
src/test/java目录新增以下单元测试用例,使得测试用例的所有方法可以通过。
public class SpringInjectionTest {
    ApplicationContext ac;

    @Before
    public void prepareSpringContainer(){
        ac=new ClassPathXmlApplicationContext("applicationContext.xml");
    }

    @Test
    public void testConstrucInjection(){
        Hero hanxin=(Hero)ac.getBean("hanxin");
        assertEquals("韩信:必将百倍奉还",hanxin.getName()+":"+hanxin.say());
    }

    @Test
    public void testSetterInjection(){
        Hero caocao=(Hero)ac.getBean("caocao");
        assertEquals("曹操:周公吐哺,天下归心",caocao.getName()+":"+caocao.say());
    }
}
【实验名称】 实验2.4 Spring 单元测试
【实验目的】
- 掌握 Spring 单元测试的编写
【实验环境】
- 内存:至少4G
- 硬盘:至少空余10G
- 操作系统: 64位 Windows系统。
【实验资源】
- IDEA
- Maven 3.6
【实验要求】
- 承接实验2.3,在
POM.xml新增以下 Spring 测试依赖。
<!-- JUnit  -->
<dependency>
  <groupId>junit</groupId>
  <artifactId>junit</artifactId>
  <version>4.13.1</version>
  <scope>test</scope>
</dependency>
<!-- Spring 测试 -->
<dependency>
  <groupId>org.springframework</groupId>
  <artifactId>spring-test</artifactId>
  <version>5.0.5.RELEASE</version>
</dependency>
- 在
src/test/java目录新增以下单元测试用例,并完善2个属性hero1和hanxin的注解,让此单元测试用例所有方法可以通过测试。
@RunWith(SpringJUnit4ClassRunner.class)
@ContextConfiguration({ "classpath:applicationContext.xml" })
public class SpringTest {

    //请补充注解1
    private Hero hero1;

    //请补充注解2
    private Hero hanxin;

    @Test
    public void testGetHero1(){
        assertEquals("曹操", hero1.getName());
    }
    @Test
    public void testGetHanxin(){
        assertEquals("韩信", hanxin.getName());
    }

    public void setHero1(Hero hero1) {
        this.hero1 = hero1;
    }

    public void setHanxin(Hero hanxin) {
        this.hanxin = hanxin;
    }
}